Difference between revisions of "Software Manual (Diva)"
(→Support service) |
DevWikiAdmin (talk | contribs) m (→Release notes) |
||
| (6 intermediate revisions by 3 users not shown) | |||
| Line 2: | Line 2: | ||
{{Applies To Diva}} | {{Applies To Diva}} | ||
{{InfoBoxBottom}} | {{InfoBoxBottom}} | ||
| − | |||
| − | |||
= Introduction = | = Introduction = | ||
| Line 43: | Line 41: | ||
== Support service == | == Support service == | ||
| − | We are committed to making our products user-friendly and will help customers use our CPU modules in their systems. Technical support is delivered through email. Support requests can be sent to [mailto: | + | We are committed to making our products user-friendly and will help customers use our CPU modules in their systems. Technical support is delivered through email. Support requests can be sent to [mailto:support-diva@dave.eu support-diva@dave.eu]. |
| − | + | Software upgrades are available in the restricted download area of '''DAVE Embedded Systems''' web site: http://www.dave.eu/reserved-area. An account is required to access this area (please contact [mailto:support-diva@dave.eu support-diva@dave.eu] for account requests). | |
| − | Software upgrades are available in the restricted download area of '''DAVE Embedded Systems''' | ||
| − | |||
Please refer to our Web site at http://www.dave.eu/dave-cpu-module-am335x-diva.html for the latest product documents, utilities, drivers, Product Change Notices, Board Support Packages, Application Notes, mechanical drawings and additional tools and software. | Please refer to our Web site at http://www.dave.eu/dave-cpu-module-am335x-diva.html for the latest product documents, utilities, drivers, Product Change Notices, Board Support Packages, Application Notes, mechanical drawings and additional tools and software. | ||
| Line 118: | Line 114: | ||
'''DAVE Embedded Systems''' adds to the latest AMSDK from Texas Instruments the customization required to support the DIVA platform. For this reason most of the documentation provided by TI remains valid for the DIVELK development kit. However, some customization is required, in particular at bootloader and linux kernel levels. | '''DAVE Embedded Systems''' adds to the latest AMSDK from Texas Instruments the customization required to support the DIVA platform. For this reason most of the documentation provided by TI remains valid for the DIVELK development kit. However, some customization is required, in particular at bootloader and linux kernel levels. | ||
| − | + | The following table shows how DIVELK releases are related to AMSDK releases. | |
| + | {| class="wikitable" | ||
| + | ! | ||
| + | !colspan="3" | DIVELK version | ||
| + | |- | ||
| + | |Release number | ||
| + | |1.0.0 | ||
| + | |2.0.0 | ||
| + | |2.1.0 | ||
| + | |- | ||
| + | |Status | ||
| + | |Released | ||
| + | |Released | ||
| + | |Released | ||
| + | |- | ||
| + | |Release date | ||
| + | |June 2013 | ||
| + | |October 2014 | ||
| + | |June 2015 | ||
| + | |- | ||
| + | |'''Release notes''' | ||
| + | |[[Software_Manual_(Diva)#DIVELK_1.0.0 | Ver 1.0.0]] | ||
| + | |[[Software_Manual_(Diva)#DIVELK_2.0.0 | Ver 2.0.0]] | ||
| + | |[[Software_Manual_(Diva)#DIVELK_2.1.0 | Ver 2.1.0]] | ||
| + | |- | ||
| + | |SOM PCB version | ||
| + | |CS133012A | ||
| + | |CS133012C | ||
| + | |CS133012C | ||
| + | |- | ||
| + | |Supported carrier boards | ||
| + | |[[DivaEVB-Lite]]<br>[[:Category:Dacu | Dacu]] | ||
| + | |[[DivaEVB-Lite]]<br>[[:Category:Dacu | Dacu]] | ||
| + | |[[DivaEVB-Lite]]<br>[[:Category:Dacu | Dacu]] | ||
| + | |- | ||
| + | |U-Boot version | ||
| + | |2012.10-divelk-1.0.0 | ||
| + | |2013.10-divelk-2.0.0 | ||
| + | |2013.10-divelk-2.1.0 | ||
| + | |- | ||
| + | |Linux version | ||
| + | |3.2.0-divelk-1.0.0 | ||
| + | |3.12.10-divelk-2.0.0 | ||
| + | |3.12.10-divelk-2.1.0 | ||
| + | |- | ||
| + | |Drivers | ||
| + | |valign="top" | SPI NOR Flash (boot)<br>NAND 8 bit (boot)<br>UART0 (2-wire)<br>USB Host<br>SD/MMC1<br>GPIO<br>LCD<br>Touch screen controller<br>EMAC0 RMII (Fast Ethernet)<br>PMIC RTC (battery powered)<br> | ||
| + | Audio (ALSA) | ||
| + | |valign="top" | SPI NOR Flash (boot)<br>NAND 8 bit (boot)<br>UART0 (2-wire)<br>USB Host<br>SD/MMC1<br>GPIO<br>LCD<br>Touch screen controller<br>EMAC0 RMII (Fast Ethernet)<br>PMIC RTC (battery powered)<br> | ||
| + | Audio (ALSA)<br>USB OTG<br>CAN<br>ADC | ||
| + | |valign="top" | SPI NOR Flash (boot)<br>NAND 8 bit (boot)<br>UART0 (2-wire)<br>USB Host<br>SD/MMC1<br>GPIO<br>LCD<br>Touch screen controller<br>EMAC0 RMII (Fast Ethernet)<br>PMIC RTC (battery powered)<br> | ||
| + | Audio (ALSA)<br>USB OTG<br>CAN<br>ADC<br>Splash screen in u-boot<br>[[ConfigID_and_UniqueID | ConfigID]] | ||
| + | |- | ||
| + | |TI AMSDK | ||
| + | |05.06.00.00 | ||
| + | |07.00.00.00 | ||
| + | |07.00.00.00 | ||
| + | |- | ||
| + | |Build System | ||
| + | | - | ||
| + | |Yocto Dylan (1.4) | ||
| + | |Yocto Dylan (1.4) | ||
| + | |- | ||
| + | |Graphic libraries | ||
| + | |Qt 4.8.4 | ||
| + | |Qt 4.8.4<br>Qt 5.x | ||
| + | |Qt 4.8.4<br>Qt 5.3 | ||
| + | |- | ||
| + | |} | ||
=== DIVELK Updates === | === DIVELK Updates === | ||
| Line 195: | Line 259: | ||
== Release notes == | == Release notes == | ||
| − | + | '''N.B.''' '''Customers who want to update from DIVELK 1.0.0 to DIVELK 2.0.0 can send an email to [mailto:support-diva@dave.eu support-diva@dave.eu]'''. | |
| + | |||
| + | === DIVELK 2.1.0 === | ||
| + | |||
| + | * Release date: June 2015 | ||
| + | * Status: Released | ||
| + | * AMSDK version: 07.00.00.00 | ||
| + | * Supported carrier boards: DIVAEVB-Lite, Dacu | ||
| + | |||
| + | ==== Notes ==== | ||
| + | |||
| + | {{ImportantMessage|text=It's highly recommended to read the [[ConfigID_and_UniqueID]] page.}} | ||
| + | * Maintenance release | ||
| + | * Updated kernel and u-boot versions | ||
| + | * Bug fixes | ||
| + | |||
| + | ==== Known limitations ==== | ||
| + | |||
| + | {| class="wikitable" | ||
| + | |- | ||
| + | !Issue # | ||
| + | !Component | ||
| + | !Subsystem | ||
| + | !Description | ||
| + | |- | ||
| + | |0001 | ||
| + | |Linux | ||
| + | |USB | ||
| + | |USB0, when configured as OTG, requires loading of the gadget module for detecting devices (and entering host mode) | ||
| + | |- | ||
| + | |0002 | ||
| + | |Yocto | ||
| + | |ADT | ||
| + | |The Yocto ADT plugin for Eclipse doesn't work | ||
| + | |- | ||
| + | |0003 | ||
| + | |Linux | ||
| + | |Audio | ||
| + | |Codec on the DACU board doesn't work out-of-the-box. A software patch is required, please contact [mailto:support-diva@dave.eu support-diva@dave.eu] for information on how to enable the audio codec. | ||
| + | |- | ||
| + | |} | ||
| + | |||
| + | |||
| + | === DIVELK 2.0.0 === | ||
| + | |||
| + | * Release date: October 2014 | ||
| + | * Status: Released | ||
| + | * AMSDK version: 07.00.00.00 | ||
| + | * Supported carrier boards: DIVAEVB-Lite, Dacu | ||
| + | |||
| + | ==== Notes ==== | ||
| + | |||
| + | * First major update | ||
| + | * Added Yocto support | ||
| + | * Updated kernel and u-boot versions | ||
| + | * Bug fixes | ||
| + | |||
| + | ==== Known limitations ==== | ||
| + | |||
| + | {| class="wikitable" | ||
| + | |- | ||
| + | !Issue # | ||
| + | !Component | ||
| + | !Subsystem | ||
| + | !Description | ||
| + | |- | ||
| + | |0001 | ||
| + | |Linux | ||
| + | |USB | ||
| + | |USB0, when configured as OTG, requires loading of the gadget module for detecting devices (and entering host mode) | ||
| + | |- | ||
| + | |0002 | ||
| + | |Yocto | ||
| + | |ADT | ||
| + | |The Yocto ADT plugin for Eclipse doesn't work | ||
| + | |- | ||
| + | |} | ||
| + | |||
| + | === DIVELK 1.0.0 === | ||
| + | |||
| + | * Release date: June 2013 | ||
| + | * Status: released | ||
| + | * AMSDK version: 05.06.00.00 | ||
| + | * Supported carrier boards: DIVAEVB-Lite, Dacu | ||
| + | |||
| + | ==== Notes ==== | ||
| + | |||
| + | * First official release | ||
= Developing environment = | = Developing environment = | ||
Revision as of 13:46, 20 August 2015
| HOME | SOMs | SBCs | ToloMEO Embedded Assistant | ||
| Roadmap | IoT Services | ML/AI services | Embedded Design Services |
Info Box
|
Contents
- 1 Introduction
- 2 DIVELK overview
- 3 Developing environment
- 4 DIVELK use cases
- 5 Application notes
Introduction[edit | edit source]
Major software components of an Embedded Linux system are:
- bootloader
- operating system kernel
- root file system, including user-space application and libraries
- tool chain (on development host)
- build system (on development host)
DIVA Embedded Linux Kit: what is it?[edit | edit source]

DIVA Embedded Linux Kit (DIVELK for short) provides all the necessary components required to set up the developing environment to:
- build the bootloader (U-Boot)
- build and run Linux operating system on DIVA-based systems
- build Linux applications that will run on the target.
The kit is composed of:
- hardware platform composed by DIVA system-on-module (SOM for short) and carrier board. Supported carrier boards are:
- DIVAEVB-Lite standalone
- DIVAEVB-Lite plugged on Dacu carrier board
- U-Boot bootloader sources
- Linux kernel sources
- Technical documentation such hardware manuals, mechanical drawings, reference schematics, application notes etc.
The documents related to the software issues help the user to quickly start configuring the bootloader and the operating system, by hiding most of the complexity of the underlying hardware. For more details about DIVA hardware characteristics, please refer to the DIVA Hardware Manual. An account for the reserved area of DAVE's website is required to access the kit contents.
DIVA Embedded Linux Kit: what is not?[edit | edit source]
The kit is neither a complete Linux programming guide nor a Linux Reference Guide. Internet provides lots of information, tutorials and examples about writing applications and drivers for this operating system and how to work with it from the user's point of view (for example, type “Linux programming” in your favorite search engine). As the kit is heavily based on open-source community-maintained software projects, DIVELK does not provide exhaustive documentation for these software components but it points out where to find the information on the Internet or books. For example, for the U-Boot bootloader, the kit does not list all the commands it handles but provides the link to the on-line documentation and to the public mailing list used by its community.
For novice users who have no experience at all with embedded Linux systems, reading article Embedded Linux is recommended.
About this manual[edit | edit source]
This document describes how to run Linux on the DIVA/DIVAEVB-Lite/Carrier-board system and how to work with DIVELK version 2.0.0 and above. For novice users who have no experience at all about embedded Linux systems, reading of Building Embedded Linux Systems By Karim Yaghmour is strongly recommended. Practically speaking, the book covers all matters involved in developing software for such systems (from tool-chain organization to the most famous file systems running on top of MTD). It is not a reference guide, but it provides a complete and exhaustive overview that helps the developer save a lot of time in searching for such information on the Internet. For a brief but still exhaustive overview of the Linux and Embedded Linux world, please look at the Training and Docs sections of Free Electrons website.
Support service[edit | edit source]
We are committed to making our products user-friendly and will help customers use our CPU modules in their systems. Technical support is delivered through email. Support requests can be sent to support-diva@dave.eu. Software upgrades are available in the restricted download area of DAVE Embedded Systems web site: http://www.dave.eu/reserved-area. An account is required to access this area (please contact support-diva@dave.eu for account requests). Please refer to our Web site at http://www.dave.eu/dave-cpu-module-am335x-diva.html for the latest product documents, utilities, drivers, Product Change Notices, Board Support Packages, Application Notes, mechanical drawings and additional tools and software.
DIVELK overview[edit | edit source]
Components[edit | edit source]
DIVA SOM[edit | edit source]

The heart of DIVA SOM is Texas Instruments "Sitara" AM335x microprocessors. From a software point of view, Texas Instruments supports this processor family through so-called Linux AM Software Development Kit (AMSDK for short). AMSDK releases are published on a regular basis. For more details please refer to:
DIVA Embedded Linux Kit, in turn, is directly derived from AMSDK. Hence DIVELK documentation often refers to AMSDK resources.
Carrier boards[edit | edit source]
DIVAEVB-Lite[edit | edit source]
DIVAEVB-Lite is an adapter board designed to evaluate the functions of DIVA system-on-module.

For further information on the DIVAEVB-Lite, please refer to DivaEVB-Lite
The following figure shows the carrier board block diagram:

Dacu[edit | edit source]
DIVAEVB-Lite can be plugged on the Dacu carrier board to extend the set of available interfaces.

For further information on Dacu, please refer to:
The following figure shows the carrier board block diagram:

Software[edit | edit source]
When we talk in general about Embedded Linux, we refer to an embedded system running Linux operating system. As the reader probably knows, Linux was first developed on the PC platform, based on the famous x86 architecture. Typical embedded systems using an operating system (O.S. for short), are equipped with much lighter software. Recent hardware advances made these systems so powerful that now they can run a complex O.S. such as Linux. This choice has several benefits:
- The developer can count on a reliable and efficient software, developed and maintained by a large community all over the world
- The software is open-source, so developers have access to the whole source code
- Since Linux runs on many different platforms (x86, PowerPC, ARM, SuperH, MIPS etc.), applications are portable by definition
- There are a lot of open-source applications running on top of Linux that can easily be integrated in the embedded system
- Last but not least, there are no license fees.
An exhaustive description of this topic is beyond the scope of this document. We recommend reading specific documents, eg Building Embedded Linux Systems By Karim Yaghmour. The typical Embedded Linux system is composed of:
- the bootloader – this software is run by the processor after exiting the reset state. It performs basic hardware initialization, retrieves the Linux kernel image (for example from a remote server via the TFTP protocol) and launches it by passing the proper arguments (command line and tags)
- the Linux kernel
- the root file system – this file system is mounted (which means "made available", "attached") by the kernel during the boot process on the root directory (“/”).
The typical developing environment for an Embedded Linux system is composed of a host machine and a target machine. The host is used by the developer to compile the code that will run on the target. In our case the target is obviously the DIVA module, while the host is assumed to be a PC running the Linux operating system. The Linux kernel running on the target can mount the root file system from different physical media. During the software development, we strongly recommend using a directory exported via NFS by the host for this purpose (see the example configuration called net_nfs).
Please note that DIVELK u-boot and kernel source trees are derived from the official trees released by TI; these trees have been customized to add support for the DIVA SOM.
For further information on AMSDK, please refer to Sitara SDK release notes.
DIVELK software components[edit | edit source]
DAVE Embedded Systems adds to the latest AMSDK from Texas Instruments the customization required to support the DIVA platform. For this reason most of the documentation provided by TI remains valid for the DIVELK development kit. However, some customization is required, in particular at bootloader and linux kernel levels.
The following table shows how DIVELK releases are related to AMSDK releases.
| DIVELK version | |||
|---|---|---|---|
| Release number | 1.0.0 | 2.0.0 | 2.1.0 |
| Status | Released | Released | Released |
| Release date | June 2013 | October 2014 | June 2015 |
| Release notes | Ver 1.0.0 | Ver 2.0.0 | Ver 2.1.0 |
| SOM PCB version | CS133012A | CS133012C | CS133012C |
| Supported carrier boards | DivaEVB-Lite Dacu |
DivaEVB-Lite Dacu |
DivaEVB-Lite Dacu |
| U-Boot version | 2012.10-divelk-1.0.0 | 2013.10-divelk-2.0.0 | 2013.10-divelk-2.1.0 |
| Linux version | 3.2.0-divelk-1.0.0 | 3.12.10-divelk-2.0.0 | 3.12.10-divelk-2.1.0 |
| Drivers | SPI NOR Flash (boot) NAND 8 bit (boot) UART0 (2-wire) USB Host SD/MMC1 GPIO LCD Touch screen controller EMAC0 RMII (Fast Ethernet) PMIC RTC (battery powered) Audio (ALSA) |
SPI NOR Flash (boot) NAND 8 bit (boot) UART0 (2-wire) USB Host SD/MMC1 GPIO LCD Touch screen controller EMAC0 RMII (Fast Ethernet) PMIC RTC (battery powered) Audio (ALSA) |
SPI NOR Flash (boot) NAND 8 bit (boot) UART0 (2-wire) USB Host SD/MMC1 GPIO LCD Touch screen controller EMAC0 RMII (Fast Ethernet) PMIC RTC (battery powered) Audio (ALSA) |
| TI AMSDK | 05.06.00.00 | 07.00.00.00 | 07.00.00.00 |
| Build System | - | Yocto Dylan (1.4) | Yocto Dylan (1.4) |
| Graphic libraries | Qt 4.8.4 | Qt 4.8.4 Qt 5.x |
Qt 4.8.4 Qt 5.3 |
DIVELK Updates[edit | edit source]
 It's recommended to use the latest available DIVELK version. Customer who want to update to the latest DIVELK release can send an email to support-diva@dave.eu. Please refer to Release notes for further information. |
Updating git repositories[edit | edit source]
In DIVELK, the following source trees are clones of DAVE Embedded Systems public git repositories:
| Component | GIT Remote | DIVELK Installation Directory |
|---|---|---|
| Linux | git@git.dave.eu:dave/diva/linux-am33x.git | /home/dvdk/divelk/linux-am33x.git |
| U-Boot | git@git.dave.eu:dave/diva/u-boot-am33x.git | /home/dvdk/divelk/u-boot-am33x.git |
| Yocto BSP | git@git.dave.eu:dave/diva/diva-bsp.git | Please refer to Building the software components with Yocto |
This means that these components can be kept in sync and up to date with DAVE Embedded Systems repositories.
RSA key generation[edit | edit source]
Please follow the procedure reported below to generate the RSA ssh key:
- select your username (ad es. username@myhost.com)
- start the DVDK and login into the virtual machine
- start a shell session
- enter the .ssh subdirectory into your home directory:
cd ~/.ssh/ - launch the following command:
ssh-keygen -t rsa -C "username@myhost.com" -f username@myhost.com
- this command creates the files
~/.ssh/username@myhost.com(private key) and~/.ssh/username@myhost.com.pub(public key) - edit your
~/.ssh/configadding the following lines:
Host git.dave.eu
    User git
    Hostname git.dave.eu
    PreferredAuthentications publickey
    IdentityFile ~/.ssh/username@myhost.com
Please send the public key file to one of the following email support addresses (depending on which SOM is included in your kit version)
with the request for the creation of a new public git account associated to your username. The support team will enable the account and send you a confirmation as soon as possible.
Synchronizing the repository[edit | edit source]
When the account is enabled, you can synchronize a source tree entering the repository directory and launching the git fetch command, like in the following example:
dvdk@dvdk-vm:~$ cd /home/dvdk/divelk/linux-am33x.git/
dvdk@dvdk-vm:/home/dvdk/divelk/linux-am33x.git$ git fetch origin
Please note that git fetch doesn't merge the commits on the current branch. To do that, you should run
git merge origin/diva
or replace the fetch-merge process with a single git pull command. Please note that the recommended method is the fetch-merge process. For further information on Git, please refer to Git Documentation.
Release notes[edit | edit source]
N.B. Customers who want to update from DIVELK 1.0.0 to DIVELK 2.0.0 can send an email to support-diva@dave.eu.
DIVELK 2.1.0[edit | edit source]
- Release date: June 2015
- Status: Released
- AMSDK version: 07.00.00.00
- Supported carrier boards: DIVAEVB-Lite, Dacu
Notes[edit | edit source]
|
It's highly recommended to read the ConfigID_and_UniqueID page. |
- Maintenance release
- Updated kernel and u-boot versions
- Bug fixes
Known limitations[edit | edit source]
| Issue # | Component | Subsystem | Description |
|---|---|---|---|
| 0001 | Linux | USB | USB0, when configured as OTG, requires loading of the gadget module for detecting devices (and entering host mode) |
| 0002 | Yocto | ADT | The Yocto ADT plugin for Eclipse doesn't work |
| 0003 | Linux | Audio | Codec on the DACU board doesn't work out-of-the-box. A software patch is required, please contact support-diva@dave.eu for information on how to enable the audio codec. |
DIVELK 2.0.0[edit | edit source]
- Release date: October 2014
- Status: Released
- AMSDK version: 07.00.00.00
- Supported carrier boards: DIVAEVB-Lite, Dacu
Notes[edit | edit source]
- First major update
- Added Yocto support
- Updated kernel and u-boot versions
- Bug fixes
Known limitations[edit | edit source]
| Issue # | Component | Subsystem | Description |
|---|---|---|---|
| 0001 | Linux | USB | USB0, when configured as OTG, requires loading of the gadget module for detecting devices (and entering host mode) |
| 0002 | Yocto | ADT | The Yocto ADT plugin for Eclipse doesn't work |
DIVELK 1.0.0[edit | edit source]
- Release date: June 2013
- Status: released
- AMSDK version: 05.06.00.00
- Supported carrier boards: DIVAEVB-Lite, Dacu
Notes[edit | edit source]
- First official release
Developing environment[edit | edit source]
Introduction[edit | edit source]
The following figure show the typical developing environment for an Embedded Linux system: it is composed of a host machine and a target machine.

The typical developing environment for an Embedded Linux system is composed of a host machine and a target machine. The host is used by the developer to (cross-)compile the code that is to run on the target. In our case the target is the DIVA CPU module, while the host is assumed to be a PC running the Linux operating system, either in a physical installation or as a virtual machine. The bootloader running on the target can download the Linux kernel image through the network (TFTP), as well as the u-boot binary images (useful when an update of the bootloader is required). Moreover, the Linux kernel running on the target is able to mount the root file system from different physical media, for example from a directory exported via Network File System (NFS) by the host. This strategy (kernel image and RFS retrieved from the network) saves time during the development phase, since no flash reprogramming or removable storage (SD, usb pen drives, external disks) is required to test new versions or updates of the software components.
Software components[edit | edit source]
Toolchain[edit | edit source]
With the term "toolchain" we refer to the set of programs that allow the building of a generic application. For applications built to run on the same platform as the tool chain, we use a native toolchain. On the contrary, for applications built to run on a target architecture different from the host architecture, we use a cross-toolchain. In this case all the tools involved in this process are lead by the “cross-” prefix. So we talk about cross-compiler, cross-toolchain and so on. The cross-toolchain used to build U-Boot and the Linux kernel is the GNU toolchain for the ARM architecture built for x86 hosts. In other words, the toolchain runs on x86 machines but generates binaries for ARM processors. As for all the software compliant to the GPL license, it is released in source code. Thus the first thing to do to set up the developing environment should be building the cross-toolchain. This is not a trivial task, it takes a lot of time and hard disk space. To avoid this tedious task, we suggest use of a pre-built toolchain as explained in the following sections.
Bootloader[edit | edit source]
U-Boot is a very powerful boot loader and it became the "de facto" standard on non-x86 embedded platforms. The main tasks performed by U-Boot are:
- hardware initialization (external bus, internal PLL, SDRAM controller etc.)
- starting a shell on the serial port allowing the user to interact with the system through the provided commands
- automatic execution of the boot script (if any)
After system power-up, U-Boot prints some information about itself and about the system it is running on. Once the bootstrap sequence is completed, the prompt is printed and U-Boot is ready to accept user's commands. U-Boot manages an environment space where several variables can be stored. These variables are extremely useful to permanently save system settings (such as ethernet MAC address) and to automate boot procedures. This environment is redundantly stored in two physical sectors of boot flash memory; the default variables set is hard-coded in the source code itself. User can modify these variables and add new ones in order to create his/her own custom set of configurations. The commands used to do that are setenv and saveenv. This process allows the user to easily set up the required configuration. Once U-Boot prompt is available, it is possible to print the whole environment by issuing the command printenv.
For further information on use of U-Boot, please refer to http://www.denx.de/wiki/view/DULG/UBoot
Kernel[edit | edit source]
Linux kernel for Sitara processors is maintained primarily by Texas Instruments, that constantly works in close cooperation with Linux community in order to push all the released drivers into mainstream kernel. Periodically TI releases the so-called Platform Support Product (PSP for short). PSP provides updated kernel sources.
Kernels released within DIVELK derive directly from PSP kernels.
For further information on Linux for TI processors, please refer to http://processors.wiki.ti.com/index.php/Category:Linux
Linux Device Tree[edit | edit source]
The Flattened Device Tree (FDT) is a data structure for describing the hardware in a system (for further information, please refer to http://elinux.org/Device_Tree). Device tree source code is stored into the arch/arm/boot/dts/ directory.
Target root file system[edit | edit source]
The Linux kernel running on the target needs to mount a root file system. Building a root file system from scratch is definitively a complex task because several well known directories must be created and populated with a lot of files that must follow some standard rules. Again we will use pre-packaged root file systems that make this task much easier.
Yocto[edit | edit source]
The Yocto Project, hosted by the Linux Foundation, provides open source, high-quality infrastructure and tools to help developers create their own custom Linux distributions for any hardware architecture and across multiple market segments. The Yocto Project is intended to simplify the work of the developers, providing a set of tools and components, including a highly configurable build system, that enables users to construct their own custom distributions, targeted for specific embedded devices. It is not, itself, a Linux distribution. Rather, it is capable of producing an image for a particular embedded device without dictating the composition of the Linux distribution actually built or the hardware architecture used. The software components for the DIVA platform can be built using Yocto and the source trees released with the DIVELK 2.0.0.
DVDK[edit | edit source]
DAVE Embedded Systems Virtual Development Kit is a virtual machine, based on Oracle VirtualBox that allows developers to start using DAVE Embedded Systems' platform without wasting time in installing the development environment. The Virtual Machine comes with all the development tools and source code, pre-configured, and requires only a minimal setup by the end user (usually only to adapt network interface to the user environment).
DVDK can also be converted, easily, into a physical environment, for example to increase speed on slower machines.
Please refer to DVDK page on DAVE Embedded Systems Developer's Wiki for further information on DVDK.
DVDK installation[edit | edit source]
DVDK features[edit | edit source]
- VirtualBox virtual machine (.OVA archive)
- Based on Lubuntu 12.04 LTS (64-bit version)
- Pre-installed VirtualBox Guest Additions
- LXDE desktop environment
- Boot disk with the distro and pre-configured basic Linux services:
- TFTP: with base directory /srv/tftp/ (please refer to VirtualBox_Network_Configuration)
- NFS: configured through the /etc/exports file (please refer to VirtualBox_Network_Configuration)
- Secondary disk containing source code and tools:
- Bootloader (u-boot) source tree cloned from DAVE Embedded Systems public git repository
- Linux kernel source tree cloned from DAVE Embedded Systems public git repository
- External pre-built toolchain
- Yocto bsp for DIVA
- Pre-installed Yocto-based root file systems with setup scripts, makefiles, example applications, ...
- Administrator account (dvdk) with autologin. Please note that the user account credentials are provided with the development kit (you can find them into the README file contained in the sw/dvdk folder of the kit distribution)
DIVELK microSD Layout[edit | edit source]
The microSD provided with DIVELK is used to store:
- A bootable partition (mmcblk0p1, vfat) containing:
- binary images (MLO, u-boot and kernel images)
- DIVELK documentation
- DIVELK DVDK virtual machine image
- DIVELK root file system partition (mmcblk0p2, ext3)
DIVELK contains all the required software and documentation to start developing Linux application on the DIVA platform.
Importing the Virtual Machine[edit | edit source]
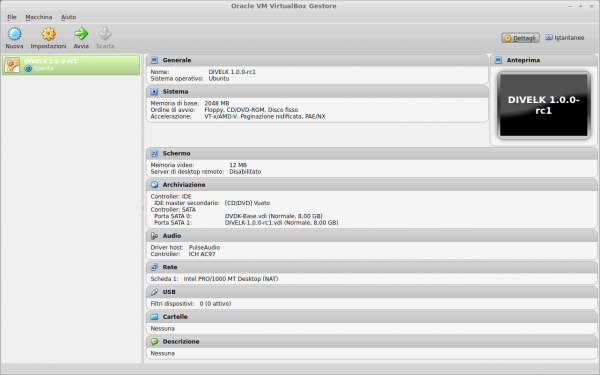
DIVELK provides a virtual machine image as a .ova file, which is a virtual application exported in Open Virtualization Format (OVF). Please find below the instructions for creating the Virtualbox virtual machine:
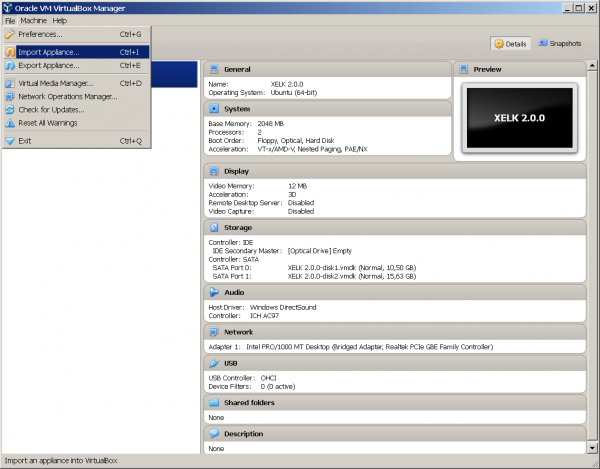
- Start the Oracle VM VirtualBox Manager
- Click on File and select "Import Virtual Application", then click on "Open Virtual Application":
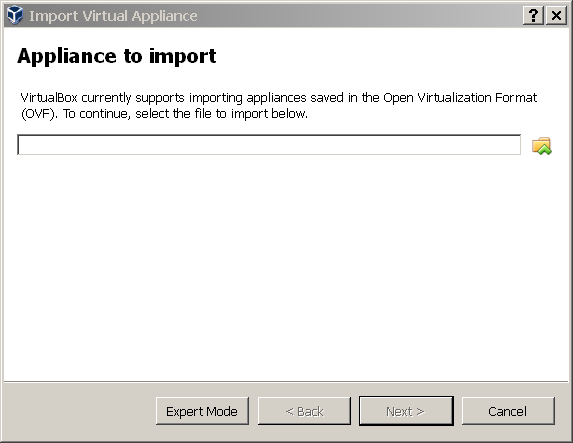
- Navigate your file system and select the .ova file provided with the DIVELK:
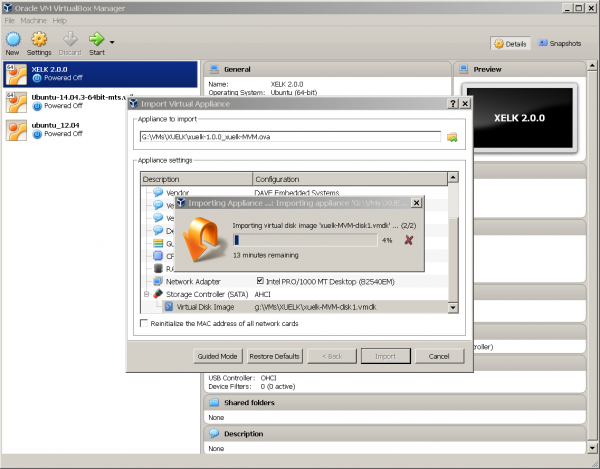
- Click "Next" and on the next window click on "Import"


Launching the Virtual Machine[edit | edit source]
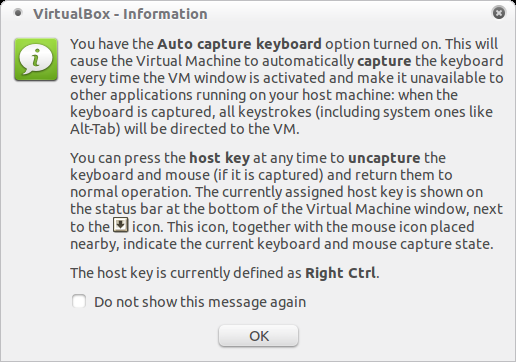
- Now that the virtual machine is ready, launch it by clicking on the start icon:
- VirtualBox will open three message windows like the following, you can click "Ok" to close them
- When the boot process is completed, you can login into the Ubuntu system with the credentials provided with the development kit (you can find them into the README file contained in the dvdk folder of the kit distribution)
- Mount the sdk disk launching the sdk-mount.sh script contained into /home/dvdk directory as shown on the image below:
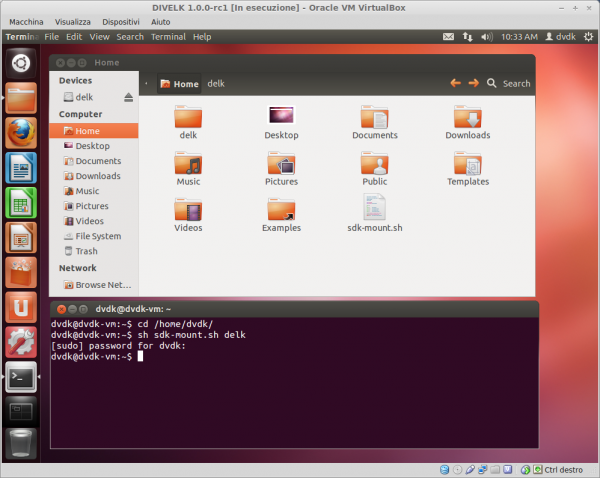


dvdk@dvdk:~$ sh sdk-mount.sh divelk
[sudo] password for dvdk:
dvdk@dvdk:~$
Guest Additions Update[edit | edit source]
Once logged in, the system could suggest to update the Virtualbox Guest Additions package. You can follow the on-screen instructions to easily install the updated package.
Further steps[edit | edit source]
- Check if your keyboard layout matches the Ubuntu keyboard settings. You can change the keyboard layout selecting System->Preferences->Keyboard from the top panel menù.
- Configure the Virtual Machine network interface: VirtualBox_Network_Configuration
- Start working with the development kit
Working with DIVELK[edit | edit source]
The build system[edit | edit source]
A build system is a set of source trees, Makefiles, patches, configuration files, tools and scripts that makes it easy to generate all the components of a complete embedded Linux system. A build system, once properly set up, automates the configuration and cross-compilation processes, generating all the required targets (userspace packages (libraries, programs), the kernel, the bootloader and root filesystem images) depending on the configuration. Some well known build systems are the following:
- OpenEmbedded (http://wiki.openembedded.net/index.php/Main_Page)
- Yocto (https://www.yoctoproject.org/)
- Buildroot (http://buildroot.uclibc.org)
The Texas Instruments Arago distribution (http://arago-project.org/wiki/index.php/Main_Page) and therefore DIVELK 2.0.0 are based on Yocto.
Overview of the installed components[edit | edit source]
Once the virtual machine is ready, the actual development kit can be found into the directory /home/dvdk/divelk: 
The divelk directory contains the following subdirectories:
- yocto: the Yocto SDK installation directory (containing the cross-toolchain)
- linux-am33x: the Linux source tree
- u-boot-am33x: the U-Boot source tree
- diva-bsp: the Yocto BSP for DIVA
- rfs: DIVELK provides three root file systems:
- diva-base: minimal root file system with basic packages (/home/dvdk/divelk/rfs/diva-base)
- diva-matrix: full root file system with lots of packages and demo applications, useful during the development phase (/home/dvdk/divelk/rfs/diva-matrix)
- diva-qt5: root file system with Qt5 libraries and examples (/home/dvdk/divelk/rfs/diva-qt5)
- env.sh: a bash script containing the following lines:
source ~/divelk/yocto/sdk/diva-qt5/environment-setup
export LDFLAGS=-L${PKG_CONFIG_SYSROOT_DIR}/usr/lib/4.7.3
export CFLAGS=""
export CPPFLAGS=""
export CXXFLAGS=""
export CPATH=""
export ARCH=arm
export CROSS_COMPILE=arm-linux-gnueabihf-
Using the following command, the environment shell variables required during the building procedure are set up:
source ~/divelk/env.sh
Setting up the server environment[edit | edit source]
During development, user needs to interact with the target system. This section describes the tools that must be installed and configured on the host system for this purpose. Please note that all these tools are already installed and properly configured on the virtual machine image provided with the DIVELK.
TFTP Server[edit | edit source]
One of the most useful features of a bootloader during development is the capability to download the Linux kernel from the network. This saves a lot of time because developer doesn't have to program the image in flash every time he/she modifies it. U-Boot implements the TFTP protocol (see the tftp command), so the host system must be configured to enable the TFTP service. Installation and configuration of a TFTP server depends on the host Linux distribution.
The default DVDK tftp installation has /srv/tftp as work directory. A subdirectory dedicated to the image files associated to the DIVELK (/srv/tftp/divelk) is available, but developers can add their custom subdirectories when required.
NFS Server[edit | edit source]
One of the most important components of a Linux system is the root file system. A good development root file system provides the developer with all the useful tools that can help developers on their work. Such a root file system can become very big in size, so it's hard to store it in flash memory. User could split the file system in different parts, mounting them from different media (flash, network, usb...). But the most convenient thing is to mount the whole root file system from the network, allowing the host system and the target to share the same files. In this way, developers can quickly modify the root file system, even “on the fly” (meaning that the file system can be modified while the system is running). The most common way to setup a system like the one described is through NFS (Network File System). As for TFTP, installation and configuration depends on the host Linux distribution.
The default DVDK NFS installation is configured for sharing /home/dvdk/divelk directory and all the subdirectories.
We recommend reading the VirtualBox_Network_Configuration page for additional details on the DVDK networking configuration and on how to enable NFS.
Pre-built toolchain[edit | edit source]
To start developing software for the DIVA platform, users need a proper toolchain, which can be pre-built or built-from-scratch. Building a toolchain from scratch is not a trivial task (though using a recent build system is easier than in the past), so the recommended approach consists in using a pre-built toolchain.
DIVELK provides the Linaro gnueabihf-4.7-2013.03 toolchain (GCC version is 4.7.3).
Pre-built root file system[edit | edit source]
Linux needs a root file system: a root file system must contain everything needed to support the Linux system (applications, settings, data, ..). The root file system is the file system that is contained on the same partition on which the root directory is located. The Linux kernel, at the end of its startup stage, mounts the root file system on the configured root device and finally launches the /sbin/init, the first user space process and "father" of all the other processes. An example of root file system is shown below:
drwxr-xr-x  2 root     root     4096 2011-05-03 11:23 bin/
drwxr-xr-x  2 root     root     4096 2011-04-01 17:20 boot/
drwxr-xr-x  3 root     root     4096 2011-07-07 12:17 dev/
drwxr-xr-x 44 root     root     4096 2011-05-03 19:02 etc/
drwxr-xr-x  4 root     root     4096 2011-04-01 17:35 home/
drwxr-xr-x  5 root     root     4096 2011-05-03 11:23 lib/
drwxr-xr-x 12 root     root     4096 2011-07-07 12:03 media/
drwxr-xr-x  6 root     root     4096 2011-05-19 16:39 mnt/
drwxr-xr-x  2 root     root     4096 2011-03-11 05:21 proc/
drwxr-xr-x  2 root     root     4096 2011-05-03 11:23 sbin/
drwxr-xr-x  2 root     root     4096 2011-03-11 05:21 sys/
lrwxrwxrwx  1 root     root        8 2011-05-30 12:19 tmp -> /var/tmp/
drwxr-xr-x 11 root     root     4096 2010-11-05 19:36 usr/
drwxr-xr-x  8 root     root     4096 2010-12-12 11:30 var/
For more information on the Linux filesystem, please refer to The Linux filesystem explained
DIVELK provides pre-built root file systems, that can be used during the evaluation/development phase, since they contains the software packages for working with the DIVA platform.
DIVELK root file systems are built with the Yocto build system and are stored into the following directories:
- /home/dvdk/divelk/rfs/diva-base
- /home/dvdk/divelk/rfs/diva-matrix
- /home/dvdk/divelk/rfs/diva-qt5
Building the software components with Yocto[edit | edit source]
The build process creates an entire Linux distribution from source. The build process can be summarized as follows:
- Make sure that all the prerequisites are met
- Initialize the build environment, as described in the following sections
- Optionally ensure the conf/local.conf configuration file, which is found in the Build Directory, is set up how you want it. This file defines many aspects of the build environment including the target machine architecture through the MACHINE variable, the development machine's processor use through the BB_NUMBER_THREADS and PARALLEL_MAKE variables, and a centralized tarball download directory through the DL_DIR variable.
- Build the image using the bitbake command. If you want information on BitBake, see the BitBake User Manual.
N.B. Since the DIVELK virtual machine is already configured to match all the requirements for using the Yocto build system, developers who wants to quickly build a Yocto image can directly go to section Software_Manual_(Diva)#Building the Yocto image.
Prerequisites[edit | edit source]
The following prerequisites are required and only need to be done once. Please note that the DIVELK virtual machine is already configured to match all the requirements for using the Yocto build system. Some generic development tools are required on the host Linux machine:
- git
- curl
- build-essential
- diffstat
- texinfo
- gawk
- chrpath
- ia32-libs (if the host machine is running a 64-bit OS)
- python-m2crypto
These packages can be installed with the following command:
sudo apt-get install git curl build-essential diffstat texinfo gawk chrpath ia32-libs python-m2crypto
It is also recommended to switch the system shell from Ubuntu's standard dash to more universal bash:
$ sudo dpkg-reconfigure dash
Initializing the build environment[edit | edit source]
In the DIVELK, we have simplified the Yocto initialization phase, relying on the repo tool and on a DIVA bsp git repository, so that the initialization can be completed with a few commands as reported below:
$ curl http://commondatastorage.googleapis.com/git-repo-downloads/repo > repo
$ chmod +x repo
$ ./repo init -u git@git.dave.eu:dave/diva/diva-bsp.git -b diva
$ ./repo sync
Building the Yocto image[edit | edit source]
Please note that even building the basic root file system requires a few hours to complete the process on a mid-hi range desktop PC (4-6 cores, 8-12 GiB RAM), also depending on the Internet connection speed (all source are fetched from the network). Nearly 20GiB of disk space is required for the build. Moreover, building inside the DVDK adds some overhead, since the performances of a virtual machine are reduced if compared to the physical hardware. Thus, it's recommended to check the hardware capabilities of the host system and, when building with Yocto is required, developers should consider the following options:
- migrating the build system to a physical machine
- assuming that the host system has the required resources, extending the hardware capabilities of the default DVDK (eg: adding more cores and disk space)
Once completed the initialization phase, developers can launch the Yocto image build process with the following commands:
$ cd ~/divelk/diva-bsp
$ source ~/divelk/env.sh
$ source diva-bsp-init-env.sh
$ bitbake matrix-rootfs-image
Please note that three different images are available:
- matrix-rootfs-image (includes the matrix gui application from Texas Instruments)
- qt5-rootfs-image (root file system with Qt 5.1.1 libraries and examples)
- base-rootfs-image (minimal root file system)
The resulting files (kernel, device tree and u-boot binaries, plus root file system in a .tar.gz archive) will then be available inside the build/tmp/deploy/images/diva directory.
4.4 Building the software components outside Yocto[edit | edit source]
Build/configure Linux kernel[edit | edit source]
Enter the Linux sources directory (~/divelk/linux-am33x.git) and run the following commands:
dvdk@dvdk-vm:~/divelk/linux-am33x$ make diva_defconfig
dvdk@dvdk-vm:~/divelk/linux-am33x$ make uImage am335x-divelk.dtb
The former command selects the default DIVA configuration, while the latter builds the kernel binary image with the required u-boot header and the dtb binary.
Default linux kernel configuration can be changed by using the standard menuconfig, xconfig, gconfig make target.
Subsequent builds just require uImage make target to update the binary image.
Once the build process is complete, the kernel binary image is stored into the arch/arm/boot/uImage file, while the dtb is stored into the linux-am33x/arch/arm/boot/dts/am335x-divelk.dtb file. These files can be copied to the /srv/tftp/divelk/ directory with the following commands:
dvdk@dvdk-vm:~/divelk/linux-am33x$ sudo cp arch/arm/boot/uImage /srv/tftp/divelk/
dvdk@dvdk-vm:~/divelk/linux-am33x$ sudo cp arch/arm/boot/dts/am335x-divelk.dtb /srv/tftp/divelk/
Build/configure U-Boot only[edit | edit source]
Enter the U-Boot sources directory (~/divelk/u-boot-am33x) and run the following commands:
dvdk@dvdk-vm:~/divelk/u-boot-am33x$ make diva_spiboot
dvdk@dvdk-vm:~/divelk/u-boot-am33x$ make
The former command selects the default DIVA configuration which is used to boot from SPI NOR Flash, while the latter builds the u-boot binary images.
Subsequent builds just require make command, without targets, to update the binary images.
U-boot is composed by two binary images called:
- MLO (which is called also SPL or 1st stage)
- u-boot.img (which is the main u-boot image, plus an additional header needed by SPL)
Once the build process is complete, the binary images can be copied to the /srv/tftp/divelk/ directory with the following command:
dvdk@dvdk-vm:~/divelk/u-boot-am33x$ sudo cp MLO MLO.byteswap u-boot.img /srv/tftp/divelk/
Build a custom application[edit | edit source]
Some users may prefer to cross-compile their applications outside of the Yocto flow. It maybe specifically useful and easier for new projects in their prototyping and proof-of-concept stages or for any smaller applications in general. This way users don't have to worry about creating Yocto "recipes" for their applications and becoming familiar with the entire Yocto build system.
In order to cross-compile an application, written in C/C++, the cross-toolchain provided with the DIVELK is required.
Assuming that the environment variables have been configured with the env.sh script, developers can write a simple "Hello world" application, called for example hello.c:
#include <stdio.h>
int main()
{
        printf("Hello world\n");
        return 0;
}
To cross-compile it:
$ arm-none-linux-gnueabi-gcc -o hello hello.c
Copy the executable file to the root file system, and execute it from the DIVA system:
root@diva:~#./hello
Hello world
Boot configurations[edit | edit source]
Please refer to the Booting_Linux_Kernel article.
Memory Map[edit | edit source]
DRAM bank   = 0x00000000
-> start    = 0x80000000
-> size     = 0x20000000
DIVA# nand info
Device 0: nand0, sector size 128 KiB
  Page size      2048 b
  OOB size         64 b
  Erase size   131072 b
Default flash NOR SPI partitions[edit | edit source]
[    1.370563] Creating 7 MTD partitions on "spi1.0":
[    1.375888] 0x000000000000-0x000000040000 : "MLO"
[    1.383286] 0x000000040000-0x0000000c0000 : "u-boot"
[    1.390594] 0x0000000c0000-0x000000100000 : "env1"
[    1.397868] 0x000000100000-0x000000140000 : "env2"
[    1.405253] 0x000000140000-0x000000180000 : "fdt"
[    1.412191] 0x000000180000-0x000000780000 : "kernel"
[    1.419714] 0x000000780000-0x000002000000 : "free"
Default flash NAND partitions[edit | edit source]
[    1.971955] Creating 9 MTD partitions on "omap2-nand.0":
[    1.977663] 0x000000000000-0x000000020000 : "SPL"
[    1.985117] 0x000000020000-0x000000040000 : "SPL.backup1"
[    1.993214] 0x000000040000-0x000000060000 : "SPL.backup2"
[    2.001160] 0x000000060000-0x000000080000 : "SPL.backup3"
[    2.009145] 0x000000080000-0x000000260000 : "u-boot"
[    2.018198] 0x000000260000-0x000000280000 : "u-boot-env"
[    2.026420] 0x000000280000-0x0000002a0000 : "fdt"
[    2.033730] 0x0000002a0000-0x0000008a0000 : "kernel"
[    2.046645] 0x0000008a0000-0x000040000000 : "rootfs"
Quick start[edit | edit source]
This section describes how to quick start a DIVA system composed of a DIVA SOM plugged into the DIVAEVB-Lite and then mounted on the Dacu carrier board, provided that it is programmed according to DIVELK configuration. The SD provided with the DIVELK can be used to boot the system, since it contains a bootable partition (mmcblk0p1) and a root file system partition (mmcblk0p2).
- connect the serial cable, provided with the board, to the J25 pin-strip connector on the Dacu board
- insert the microSD card provided with the development kit into the microSD slot
- connect a 12Vcc power supply to JP2 on the Dacu board
- (optional) connect this cable to PC COM port through a NULL-modem cable (not provided)
- (optional) start your favourite terminal software on PC; communication parameters are:
- baud rate: 115200 Bps
- data bits: 8
- stop bits: 1
- parity: none
- (optional) to connect the system to Ethernet LAN, please plug cable on connector J7 of the DIVAEVB-Lite
The system is configured to boot automatically, when powered up, from the SD card, loading u-boot which runs themmcboot macro, that loads the kernel and launches it with the options for mounting the root file system from the mmcblk0p2 partition.
The following messages will be printed on serial console (please note that messages may vary for different U-Boot releases):
U-Boot SPL 2013.10 (Sep 13 2014 - 10:43:18) [divelk-2.0.0]
reading u-boot.img
reading u-boot.img


U-Boot 2013.10 (Sep 13 2014 - 10:43:18) [divelk-2.0.0]

AM335X-GP rev 1 720 MHz
I2C:   ready
DRAM:  512 MiB
WARNING: Caches not enabled
Now running in RAM - U-Boot at: 9ff50000
NAND:  1024 MiB
MMC:   OMAP SD/MMC: 0, OMAP SD/MMC: 1
SF: Detected S25FL256S_64K with page size 256 Bytes, erase size 64 KiB, total 32 MiB
*** Warning - bad CRC, using default environment

Net:   cpsw, usb_ether
Hit any key to stop autoboot:  0
trying to boot from DIVELK MMC

reading boot.scr
419 bytes read in 5 ms (81.1 KiB/s)
## Executing script at 80900000
reading uImage
4714280 bytes read in 490 ms (9.2 MiB/s)
reading am335x-divelk.dtb
37129 bytes read in 11 ms (3.2 MiB/s)
## Booting kernel from Legacy Image at 80200000 ...
   Image Name:   Linux-3.12.10-divelk-2.0.0
   Image Type:   ARM Linux Kernel Image (uncompressed)
   Data Size:    4714216 Bytes = 4.5 MiB
   Load Address: 80008000
   Entry Point:  80008000
   Verifying Checksum ... OK
## Flattened Device Tree blob at 80f80000
   Booting using the fdt blob at 0x80f80000
   Loading Kernel Image ... OK
   Loading Device Tree to 9fe02000, end 9fe0e108 ... OK

Starting kernel ...

[    0.000000] Booting Linux on physical CPU 0x0
[    0.000000] Linux version 3.12.10-divelk-2.0.0 (amon@linuxserver2) (gcc version 4.7.3 20130226 (prerelease) (crosstool-NG linaro-1.13.1-4.7-2013.03-20130313 - Linaro GCC 2013.03) ) #26 SMP Sat Sep 13
 10:45:59 CEST 2014
[    0.000000] CPU: ARMv7 Processor [413fc082] revision 2 (ARMv7), cr=10c53c7d
[    0.000000] CPU: PIPT / VIPT nonaliasing data cache, VIPT aliasing instruction cache
[    0.000000] Machine: Generic AM33XX (Flattened Device Tree), model: DAVE Embedded System DIVELK
[    0.000000] cma: CMA: reserved 24 MiB at 9e000000
[    0.000000] Memory policy: ECC disabled, Data cache writeback
[    0.000000] CPU: All CPU(s) started in SVC mode.
[    0.000000] AM335X ES1.0 (sgx neon )
[    0.000000] PERCPU: Embedded 8 pages/cpu @c0d9a000 s9024 r8192 d15552 u32768
[    0.000000] Built 1 zonelists in Zone order, mobility grouping on.  Total pages: 129280
[    0.000000] Kernel command line: root=/dev/mmcblk0p2 rw console=ttyO0,115200n8 consoleblank=0 mtdparts=omap2-nand.0:128k(SPL),128k(SPL.backup1),128k(SPL.backup2),128k(SPL.backup3),1920k(u-boot),128k(
u-boot-env),128k(fdt),6m(kernel),-(rootfs);spi1.0:256k(MLO),512k(u-boot),256k(env1),256k(env2),256k(fdt),6m(kernel),-(free)
[    0.000000] PID hash table entries: 2048 (order: 1, 8192 bytes)
[    0.000000] Dentry cache hash table entries: 65536 (order: 6, 262144 bytes)
[    0.000000] Inode-cache hash table entries: 32768 (order: 5, 131072 bytes)
[    0.000000] Memory: 482188K/521216K available (6358K kernel code, 562K rwdata, 2168K rodata, 368K init, 254K bss, 39028K reserved, 0K highmem)
[    0.000000] Virtual kernel memory layout:
[    0.000000]     vector  : 0xffff0000 - 0xffff1000   (   4 kB)
[    0.000000]     fixmap  : 0xfff00000 - 0xfffe0000   ( 896 kB)
[    0.000000]     vmalloc : 0xe0800000 - 0xff000000   ( 488 MB)
[    0.000000]     lowmem  : 0xc0000000 - 0xe0000000   ( 512 MB)
[    0.000000]     pkmap   : 0xbfe00000 - 0xc0000000   (   2 MB)
[    0.000000]     modules : 0xbf000000 - 0xbfe00000   (  14 MB)
[    0.000000]       .text : 0xc0008000 - 0xc085bf9c   (8528 kB)
[    0.000000]       .init : 0xc085c000 - 0xc08b8340   ( 369 kB)
[    0.000000]       .data : 0xc08ba000 - 0xc09468b0   ( 563 kB)
[    0.000000]        .bss : 0xc09468b8 - 0xc09863f4   ( 255 kB)
[    0.000000] Hierarchical RCU implementation.
[    0.000000]  RCU restricting CPUs from NR_CPUS=2 to nr_cpu_ids=1.
[    0.000000] NR_IRQS:16 nr_irqs:16 16
[    0.000000] IRQ: Found an INTC at 0xfa200000 (revision 5.0) with 128 interrupts
[    0.000000] Total of 128 interrupts on 1 active controller
[    0.000000] OMAP clockevent source: timer2 at 24000000 Hz
[    0.000000] sched_clock: 32 bits at 24MHz, resolution 41ns, wraps every 178956ms
[    0.000000] OMAP clocksource: timer1 at 24000000 Hz
[    0.000000] Console: colour dummy device 80x30
[    0.000409] Calibrating delay loop... 479.23 BogoMIPS (lpj=2396160)
[    0.119684] pid_max: default: 32768 minimum: 301
[    0.119839] Security Framework initialized
[    0.119964] Mount-cache hash table entries: 512
[    0.131811] CPU: Testing write buffer coherency: ok
[    0.132332] CPU0: thread -1, cpu 0, socket -1, mpidr 0
[    0.132408] Setting up static identity map for 0xc063b648 - 0xc063b6b8
[    0.137504] Brought up 1 CPUs
[    0.137533] SMP: Total of 1 processors activated.
[    0.137544] CPU: All CPU(s) started in SVC mode.
[    0.138587] devtmpfs: initialized
[    0.143587] VFP support v0.3: implementor 41 architecture 3 part 30 variant c rev 3
[    0.209601] omap_hwmod: debugss: _wait_target_disable failed
[    0.210581] pinctrl core: initialized pinctrl subsystem
[    0.211857] regulator-dummy: no parameters
[    0.214690] NET: Registered protocol family 16
[    0.217798] DMA: preallocated 256 KiB pool for atomic coherent allocations
[    0.221492] cpuidle: using governor ladder
[    0.221516] cpuidle: using governor menu
[    0.230756] platform mpu.1: FIXME: clock-name 'fck' DOES NOT exist in dt!
[    0.232413] platform 49000000.edma: FIXME: clock-name 'fck' DOES NOT exist in dt!
[    0.234218] OMAP GPIO hardware version 0.1
[    0.247827] omap-gpmc 50000000.gpmc: could not find pctldev for node /pinmux@44e10800/nandflash_pins_default, deferring probe
[    0.247871] platform 50000000.gpmc: Driver omap-gpmc requests probe deferral
[    0.248489] platform 56000000.sgx: FIXME: clock-name 'fck' DOES NOT exist in dt!
[    0.253038] DSS not supported on this SoC
[    0.253065] No ATAGs?
[    0.253079] hw-breakpoint: debug architecture 0x4 unsupported.
[    0.295970] bio: create slab <bio-0> at 0
[    0.319222] edma-dma-engine edma-dma-engine.0: TI EDMA DMA engine driver
[    0.321038] vin: 5000 mV
[    0.323718] SCSI subsystem initialized
[    0.325674] usbcore: registered new interface driver usbfs
[    0.325939] usbcore: registered new interface driver hub
[    0.326254] usbcore: registered new device driver usb
[    0.327385] omap_i2c 44e0b000.i2c: could not find pctldev for node /pinmux@44e10800/pinmux_i2c0_pins, deferring probe
[    0.327421] platform 44e0b000.i2c: Driver omap_i2c requests probe deferral
[    0.327950] pps_core: LinuxPPS API ver. 1 registered
[    0.327964] pps_core: Software ver. 5.3.6 - Copyright 2005-2007 Rodolfo Giometti <giometti@linux.it>
[    0.328161] PTP clock support registered
[    0.330978] Advanced Linux Sound Architecture Driver Initialized.
[    0.332716] Switched to clocksource timer1
[    0.363794] NET: Registered protocol family 2
[    0.364657] TCP established hash table entries: 4096 (order: 3, 32768 bytes)
[    0.364762] TCP bind hash table entries: 4096 (order: 3, 32768 bytes)
[    0.364847] TCP: Hash tables configured (established 4096 bind 4096)
[    0.364928] TCP: reno registered
[    0.364948] UDP hash table entries: 256 (order: 1, 8192 bytes)
[    0.364976] UDP-Lite hash table entries: 256 (order: 1, 8192 bytes)
[    0.365256] NET: Registered protocol family 1
[    0.365759] RPC: Registered named UNIX socket transport module.
[    0.365774] RPC: Registered udp transport module.
[    0.365783] RPC: Registered tcp transport module.
[    0.365793] RPC: Registered tcp NFSv4.1 backchannel transport module.
[    0.367016] NetWinder Floating Point Emulator V0.97 (double precision)
[    0.367827] PM: Loading am335x-pm-firmware.bin
[    0.530548] VFS: Disk quotas dquot_6.5.2
[    0.530738] Dquot-cache hash table entries: 1024 (order 0, 4096 bytes)
[    0.531740] NFS: Registering the id_resolver key type
[    0.531867] Key type id_resolver registered
[    0.531880] Key type id_legacy registered
[    0.532254] NTFS driver 2.1.30 [Flags: R/W].
[    0.532307] jffs2: version 2.2. (NAND) (SUMMARY)  �© 2001-2006 Red Hat, Inc.
[    0.532535] msgmni has been set to 989
[    0.535449] NET: Registered protocol family 38
[    0.535511] io scheduler noop registered
[    0.535523] io scheduler deadline registered
[    0.535560] io scheduler cfq registered (default)
[    0.538175] pinctrl-single 44e10800.pinmux: 142 pins at pa f9e10800 size 568
[    0.590593] Console: switching to colour frame buffer device 100x30
[    0.598277] Serial: 8250/16550 driver, 4 ports, IRQ sharing enabled
[    0.601816] 44e09000.serial: ttyO0 at MMIO 0x44e09000 (irq = 88, base_baud = 3000000) is a OMAP UART0
[    1.281209] console [ttyO0] enabled
[    1.286942] omap_rng 48310000.rng: OMAP Random Number Generator ver. 20
[    1.310673] brd: module loaded
[    1.323060] loop: module loaded
[    1.333908] mtdoops: mtd device (mtddev=name/number) must be supplied
[    1.343735] edma-dma-engine edma-dma-engine.0: allocated channel for 0:17
[    1.350969] edma-dma-engine edma-dma-engine.0: allocated channel for 0:16
[    1.358842] m25p80 spi1.0: s25fl256s1 (32768 Kbytes)
[    1.364293] 7 cmdlinepart partitions found on MTD device spi1.0
[    1.370563] Creating 7 MTD partitions on "spi1.0":
[    1.375888] 0x000000000000-0x000000040000 : "MLO"
[    1.383286] 0x000000040000-0x0000000c0000 : "u-boot"
[    1.390594] 0x0000000c0000-0x000000100000 : "env1"
[    1.397868] 0x000000100000-0x000000140000 : "env2"
[    1.405253] 0x000000140000-0x000000180000 : "fdt"
[    1.412191] 0x000000180000-0x000000780000 : "kernel"
[    1.419714] 0x000000780000-0x000002000000 : "free"
[    1.428475] CAN device driver interface
[    1.434708] c_can_platform 481cc000.d_can: c_can_platform device registered (regs=fa1cc000, irq=68)
[    1.446015] usbcore: registered new interface driver asix
[    1.452044] usbcore: registered new interface driver ax88179_178a
[    1.458930] usbcore: registered new interface driver cdc_ether
[    1.465550] usbcore: registered new interface driver r815x
[    1.471615] usbcore: registered new interface driver smsc95xx
[    1.477990] usbcore: registered new interface driver net1080
[    1.484283] usbcore: registered new interface driver cdc_subset
[    1.490779] usbcore: registered new interface driver zaurus
[    1.497093] usbcore: registered new interface driver cdc_ncm
[    1.503937] ehci_hcd: USB 2.0 'Enhanced' Host Controller (EHCI) Driver
[    1.510886] ehci-omap: OMAP-EHCI Host Controller driver
[    1.517235] usbcore: registered new interface driver cdc_wdm
[    1.523592] usbcore: registered new interface driver usb-storage
[    1.530485] usbcore: registered new interface driver usbserial
[    1.537087] usbcore: registered new interface driver usbserial_generic
[    1.544375] usbserial: USB Serial support registered for generic
[    1.550984] usbcore: registered new interface driver ftdi_sio
[    1.557337] usbserial: USB Serial support registered for FTDI USB Serial Device
[    1.569745] musb-hdrc musb-hdrc.0.auto: Enabled SW babble control
[    1.576609] musb-hdrc musb-hdrc.0.auto: Falied to request rx1.
[    1.583022] musb-hdrc musb-hdrc.0.auto: musb_init_controller failed with status -517
[    1.591267] platform musb-hdrc.0.auto: Driver musb-hdrc requests probe deferral
[    1.601463] musb-hdrc musb-hdrc.1.auto: Enabled SW babble control
[    1.608210] musb-hdrc musb-hdrc.1.auto: Falied to request rx1.
[    1.614488] musb-hdrc musb-hdrc.1.auto: musb_init_controller failed with status -517
[    1.622856] platform musb-hdrc.1.auto: Driver musb-hdrc requests probe deferral
[    1.653327] mousedev: PS/2 mouse device common for all mice
[    1.660663] input: ti-tsc as /devices/ocp.2/44e0d000.tscadc/TI-am335x-tsc/input/input0
[    1.671593] i2c /dev entries driver
[    1.678569] omap_wdt: OMAP Watchdog Timer Rev 0x01: initial timeout 60 sec
[    1.688151] edma-dma-engine edma-dma-engine.0: allocated channel for 0:25
[    1.695572] edma-dma-engine edma-dma-engine.0: allocated channel for 0:24
[    1.702910] omap_hsmmc 48060000.mmc: unable to get vmmc regulator -517
[    1.709845] edma-dma-engine edma-dma-engine.0: freeing channel for 24
[    1.716920] edma-dma-engine edma-dma-engine.0: freeing channel for 25
[    1.723910] platform 48060000.mmc: Driver omap_hsmmc requests probe deferral
[    1.732299] ledtrig-cpu: registered to indicate activity on CPUs
[    1.739174] edma-dma-engine edma-dma-engine.0: allocated channel for 0:36
[    1.746525] omap-sham 53100000.sham: hw accel on OMAP rev 4.3
[    1.754574] omap-aes 53500000.aes: OMAP AES hw accel rev: 3.2
[    1.760718] edma-dma-engine edma-dma-engine.0: allocated channel for 0:5
[    1.768028] edma-dma-engine edma-dma-engine.0: allocated channel for 0:6
[    1.777248] usbcore: registered new interface driver usbhid
[    1.783237] usbhid: USB HID core driver
[    1.791362] usbcore: registered new interface driver snd-usb-audio
[    1.801674] UDA134X SoC Audio Codec
[    1.824052] davinci_evm sound.4:  uda134x-hifi <-> 48038000.mcasp mapping ok
[    1.837299] oprofile: no performance counters
[    1.842555] oprofile: using timer interrupt.
[    1.847618] TCP: cubic registered
[    1.851130] Initializing XFRM netlink socket
[    1.855784] NET: Registered protocol family 17
[    1.860546] NET: Registered protocol family 15
[    1.865336] can: controller area network core (rev 20120528 abi 9)
[    1.872096] NET: Registered protocol family 29
[    1.876881] can: raw protocol (rev 20120528)
[    1.881397] can: broadcast manager protocol (rev 20120528 t)
[    1.887520] 8021q: 802.1Q VLAN Support v1.8
[    1.892100] Key type dns_resolver registered
[    1.897496] cpu cpu0: cpu0 regulator not ready, retry
[    1.903001] platform cpufreq-cpu0.0: Driver cpufreq-cpu0 requests probe deferral
[    1.911300] PM: CM3 Firmware Version = 0x187
[    1.916487] ThumbEE CPU extension supported.
[    1.923680] omap-gpmc 50000000.gpmc: GPMC revision 6.0
[    1.929131] gpmc_mem_init: disabling cs 0 mapped at 0x0-0x1000000
[    1.937019] NAND device: Manufacturer ID: 0xec, Chip ID: 0xd3 (Samsung NAND 1GiB 3,3V 8-bit), 1024MiB, page size: 2048, OOB size: 64
[    1.949754] omap2-nand: detected x8 NAND flash
[    1.954499] nand: using OMAP_ECC_BCH8_CODE_HW ECC scheme
[    1.960175] omap2-nand: using custom ecc layout
[    1.965136] 9 cmdlinepart partitions found on MTD device omap2-nand.0
[    1.971955] Creating 9 MTD partitions on "omap2-nand.0":
[    1.977663] 0x000000000000-0x000000020000 : "SPL"
[    1.985117] 0x000000020000-0x000000040000 : "SPL.backup1"
[    1.993214] 0x000000040000-0x000000060000 : "SPL.backup2"
[    2.001160] 0x000000060000-0x000000080000 : "SPL.backup3"
[    2.009145] 0x000000080000-0x000000260000 : "u-boot"
[    2.018198] 0x000000260000-0x000000280000 : "u-boot-env"
[    2.026420] 0x000000280000-0x0000002a0000 : "fdt"
[    2.033730] 0x0000002a0000-0x0000008a0000 : "kernel"
[    2.046645] 0x0000008a0000-0x000040000000 : "rootfs"
[    2.910559] vrtc: 1800 mV
[    2.914394] vrtc: supplied by vin
[    2.921442] vio: 1500 <--> 3300 mV at 1500 mV
[    2.926452] vio: supplied by vin
[    2.934061] vdd_mpu: 600 <--> 1500 mV at 1137 mV
[    2.939149] vdd_mpu: supplied by vin
[    2.947000] vdd_core: 600 <--> 1500 mV at 1137 mV
[    2.952150] vdd_core: supplied by vin
[    2.959384] vdd3: 5000 mV
[    2.965617] vdig1: 1200 <--> 2700 mV at 1800 mV
[    2.970598] vdig1: supplied by vin
[    2.977702] vdig2: 1200 <--> 1800 mV at 1800 mV
[    2.982663] vdig2: supplied by vin
[    2.989856] vpll: 1800 <--> 2500 mV at 1800 mV
[    2.994840] vpll: supplied by vin
[    3.001759] vdac: 1800 <--> 2850 mV at 1800 mV
[    3.006728] vdac: supplied by vin
[    3.013866] vaux1: 1800 <--> 2850 mV at 1800 mV
[    3.018861] vaux1: supplied by vin
[    3.026421] vaux2: 1800 <--> 2800 mV at 3300 mV
[    3.031390] vaux2: supplied by vin
[    3.038485] vaux33: 1800 <--> 3300 mV at 3300 mV
[    3.043689] vaux33: supplied by vin
[    3.050823] vmmc: 1800 <--> 3300 mV at 3300 mV
[    3.055802] vmmc: supplied by vin
[    3.073949] tps65910-rtc tps65910-rtc: rtc core: registered tps65910-rtc as rtc0
[    3.083252] at24 0-0050: 4096 byte 24c32 EEPROM, writable, 32 bytes/write
[    3.092440] ina2xx 0-0041: power monitor ina226 (Rshunt = 10000 uOhm)
[    3.099442] omap_i2c 44e0b000.i2c: bus 0 rev0.11 at 100 kHz
[    3.106054] musb-hdrc musb-hdrc.0.auto: Enabled SW babble control
[    3.114825] musb-hdrc musb-hdrc.0.auto: MUSB HDRC host driver
[    3.121563] musb-hdrc musb-hdrc.0.auto: new USB bus registered, assigned bus number 1
[    3.130296] usb usb1: New USB device found, idVendor=1d6b, idProduct=0002
[    3.137543] usb usb1: New USB device strings: Mfr=3, Product=2, SerialNumber=1
[    3.145203] usb usb1: Product: MUSB HDRC host driver
[    3.150459] usb usb1: Manufacturer: Linux 3.12.10-divelk-2.0.0 musb-hcd
[    3.157470] usb usb1: SerialNumber: musb-hdrc.0.auto
[    3.164033] hub 1-0:1.0: USB hub found
[    3.168106] hub 1-0:1.0: 1 port detected
[    3.173859] musb-hdrc musb-hdrc.1.auto: Enabled SW babble control
[    3.182507] musb-hdrc musb-hdrc.1.auto: MUSB HDRC host driver
[    3.189383] musb-hdrc musb-hdrc.1.auto: new USB bus registered, assigned bus number 2
[    3.198116] usb usb2: New USB device found, idVendor=1d6b, idProduct=0002
[    3.205382] usb usb2: New USB device strings: Mfr=3, Product=2, SerialNumber=1
[    3.213083] usb usb2: Product: MUSB HDRC host driver
[    3.218342] usb usb2: Manufacturer: Linux 3.12.10-divelk-2.0.0 musb-hcd
[    3.225358] usb usb2: SerialNumber: musb-hdrc.1.auto
[    3.231979] hub 2-0:1.0: USB hub found
[    3.236124] hub 2-0:1.0: 1 port detected
[    3.241593] edma-dma-engine edma-dma-engine.0: allocated channel for 0:25
[    3.248906] edma-dma-engine edma-dma-engine.0: allocated channel for 0:24
[    3.341278] mmc0: host does not support reading read-only switch. assuming write-enable.
[    3.352042] mmc0: new high speed SDHC card at address 1234
[    3.358955] mmcblk0: mmc0:1234 SA16G 14.6 GiB
[    3.363802] davinci_mdio 4a101000.mdio: davinci mdio revision 1.6
[    3.370249] davinci_mdio 4a101000.mdio: detected phy mask ffffffbf
[    3.379000] libphy: 4a101000.mdio: probed
[    3.383422] davinci_mdio 4a101000.mdio: phy[6]: device 4a101000.mdio:06, driver SMSC LAN8710/LAN8720
[    3.393289]  mmcblk0: p1 p2
[    3.398432] Detected MACID = 00:50:c2:1e:af:e0
[    3.409822] tps65910-rtc tps65910-rtc: setting system clock to 2014-10-03 10:36:29 UTC (1412332589)
[    3.425312] ALSA device list:
[    3.428505]   #0: Diva Dacu
[    3.440728] kjournald starting.  Commit interval 5 seconds
[    3.461578] EXT3-fs (mmcblk0p2): using internal journal
[    3.467158] EXT3-fs (mmcblk0p2): mounted filesystem with ordered data mode
[    3.474540] VFS: Mounted root (ext3 filesystem) on device 179:2.
[    3.483932] devtmpfs: mounted
[    3.487639] Freeing unused kernel memory: 368K (c085c000 - c08b8000)
INIT: version 2.88 booting
Starting udev
[    4.382357] udevd[954]: starting version 182
[    9.887444] FAT-fs (mmcblk0p1): Volume was not properly unmounted. Some data may be corrupt. Please run fsck.
[   10.144522] cryptodev: driver 1.6 loaded.
Starting Bootlog daemon: bootlogd: cannot allocate pseudo tty: No such file or directory
bootlogd.
ALSA: Restoring mixer settings...
Configuring network interfaces... [   13.122234] net eth0: initializing cpsw version 1.12 (0)
[   13.130330] net eth0: phy found : id is : 0x7c0f1
[   13.144609] 8021q: adding VLAN 0 to HW filter on device eth0
udhcpc (v1.20.2) started
Sending discover...
Sending discover...
[   16.362961] libphy: 4a101000.mdio:06 - Link is Up - 100/Full
Sending discover...
No lease, failing
done.
INIT: Entering runlevel: 5
Starting system message bus: dbus.
UIM SYSFS Node Not Found
Starting Dropbear SSH server: dropbear.
Starting telnet daemon.
Starting syslogd/klogd: done
Starting thttpd.
Starting PVR
***************************************************************
***************************************************************
NOTICE: This file system contains the followin GPLv3 packages:
        binutils-symlinks
        binutils
        gdbserver

If you do not wish to distribute GPLv3 components please remove
the above packages prior to distribution.  This can be done using
the opkg remove command.  i.e.:
    opkg remove <package>
Where <package> is the name printed in the list above

NOTE: If the package is a dependency of another package you
      will be notified of the dependent packages.  You should
      use the --force-removal-of-dependent-packages option to
      also remove the dependent packages as well
***************************************************************
***************************************************************
Stopping Bootlog daemon: bootlogd.
umount: can't umount /mnt/.psplash: Device or resource busy

 _____                    _____           _         _
|  _  |___ ___ ___ ___   |  _  |___ ___  |_|___ ___| |_
|     |  _| .'| . | . |  |   __|  _| . | | | -_|  _|  _|
|__|__|_| |__,|_  |___|  |__|  |_| |___|_| |___|___|_|
              |___|                    |___|

Arago Project http://arago-project.org diva ttyO0

Arago 2013.12 diva ttyO0

diva login:
The console dump below (obtained using the print command) shows the default u-boot environment:
DIVA# print
addcons=setenv bootargs ${bootargs} console=${console} earlyprintk no_console_suspend loglevel=8
addip=setenv bootargs ${bootargs} ip=${ipaddr}:${serverip}:${gatewayip}:${netmask}:${hostname}:${netdev}:off panic=1 eth=${ethaddr}
addmisc=setenv bootargs ${bootargs} ${mtdparts}\\;${mtdparts_spi}
arch=arm
baudrate=115200
board=diva
board_name=diva
bootcmd=echo trying to boot from DIVELK MMC; mmc rescan 0; fatload mmc 0 80900000 boot.scr; source 80900000; dcache on; run net_nfs
bootdelay=3
bootfile=diva/uImage
console=ttyO0,115200n8
cpu=armv7
eth1addr=c4:ed:ba:7f:c1:46
ethact=cpsw
ethaddr=00:50:c2:1e:af:e0
ethdev=eth0
fdtaddr=0x80F80000
fdtfile=diva/am335x-divelk.dtb
gatewayip=192.168.0.254
hostname=divelk
ipaddr=192.168.0.89
kloadaddr=0x80007fc0
load=tftp ${loadaddr} diva/u-boot.img
loadaddr=0x80200000
loadfdt=tftp ${fdtaddr} ${fdtfile}
loadk=tftp ${kloadaddr} ${bootfile}
mtdids=nand0=omap2-nand.0
mtdparts=mtdparts=omap2-nand.0:128k(SPL),128k(SPL.backup1),128k(SPL.backup2),128k(SPL.backup3),1920k(u-boot),128k(u-boot-env),128k(fdt),6m(kernel),-(rootfs)
mtdparts_spi=spi1.0:256k(MLO),512k(u-boot),256k(env1),256k(env2),256k(fdt),6m(kernel),-(free)
nand_load_1st=tftp ${loadaddr} diva/MLO
nand_nfs=nand read ${kloadaddr} kernel 0x600000; nand read ${fdtaddr} fdt 0x40000; run nfsargs addip addcons addmisc; dcache on; bootm ${kloadaddr} - ${fdtaddr}
nand_update=nand erase.part u-boot; nand write ${loadaddr} u-boot ${filesize}
nand_update_1st=nand erase.part SPL; nand write ${loadaddr} SPL ${filesize}
nand_updatefdt=nand erase.part fdt; nand write ${fdtaddr} fdt ${filesize}
nand_updatek=nand erase.part kernel; nand write ${kloadaddr} kernel ${filesize}
net_nfs=run loadk loadfdt nfsargs addip addcons addmisc; dcache on; bootm ${kloadaddr} - ${fdtaddr}
netdev=eth0
netmask=255.255.255.0
nfsargs=setenv bootargs root=/dev/nfs rw nfsroot=${serverip}:${rootpath} rootdelay=2
rootpath=/opt/nfsroot/diva/divelk
serverip=192.168.0.13
soc=am33xx
spi_load_1st=tftp ${loadaddr} diva/MLO.byteswap
spi_nfs=sf probe;sf read ${kloadaddr} 0x180000 0x600000; sf read ${fdtaddr} 0x140000 0x40000; run nfsargs addip addcons addmisc; dcache on; bootm ${kloadaddr} -}
spi_update=sf probe 0:0; sf erase 0x40000 0x80000; sf write ${loadaddr} 0x40000 0x80000
spi_update_1st=sf probe 0:0; sf erase 0x0 0x40000; sf write ${loadaddr} 0x0 0x40000
spi_updatefdt=sf probe 0:0; sf erase 0x140000 0x40000; sf write ${fdtaddr} 0x140000 0x40000
spi_updatek=sf probe 0:0; sf erase 0x180000 0x600000; sf write ${kloadaddr} 0x180000 0x600000
stderr=serial
stdin=serial
stdout=serial
usbnet_devaddr=c4:ed:ba:7f:c1:46
vendor=dave
ver=U-Boot 2013.10 (Sep 13 2014 - 10:43:18) [divelk-2.0.0]

Environment size: 2786/262139 bytes
DIVA#
DIVELK use cases[edit | edit source]
DIVA Frequency Scaling[edit | edit source]
The frequency of the CPU can be changed on the run using the Cpufreq framework (please refer to the documentation included into the linux-am33x/Documentation/cpu-freq directory of the kernel source tree). The cpufreq framework works in conjunction with the related driver & governor.
Cpufreq implementation controls the Linux OPP (Operating Performance Points) adjusting the Cortex-A8 core voltages and frequencies. CPUFreq is enabled by default in the DIVA kernel configuration.
To view the available governors:
root@am335x-evm:~# cat /sys/devices/system/cpu/cpu0/cpufreq/scaling_available_governors
conservative ondemand powersave userspace performance
root@am335x-evm:~#
To view the supported OPP's (frequency in KHz):
root@am335x-evm:~# cat /sys/devices/system/cpu/cpu0/cpufreq/scaling_available_frequencies
275000 500000 600000 720000
root@am335x-evm:~#
To change the OPP:
root@am335x-evm:~# echo 275000 > /sys/devices/system/cpu/cpu0/cpufreq/scaling_setspeed
root@am335x-evm:~#
Please note that OPP can be changed only using the userspace governor. If governors like ondemand is used, OPP change happens automatically based on the system load.
For further details, please refer to the AM335x Linux Power Management User Guide.
Forcing the kernel to use a limited amount of RAM[edit | edit source]
To evaluate the performances of the system with a specific amount of available RAM, the user can pass the mem parameter to the kernel, by setting the command line arguments in u-boot (for detailed instruction, please refer to the Change_Linux_Command_Line_Parameter_from_U-boot page).
For example, to limit the amount of RAM to 128 MB, create the following variables in u-boot:
DIVA# setenv mem 128MB
DIVA# setenv addmem 'setenv bootargs ${bootargs} mem=${mem}'
And add the addmem variable to the boot macro:
DIVA# setenv net_nfs 'run loadk nfsargs addip addcons addmem; bootm ${buf}'
For further details, please refer to the linux-am33x/Documentation/kernel-parameters.txt file of the kernel source tree provided with the DIVELK.
Using GPIOs from userspace[edit | edit source]
Please refer to the official documentation from the TI wiki: http://processors.wiki.ti.com/index.php/GPIO_Driver_Guide#User_Space_-_Sysfs_control
Running QT applications[edit | edit source]
The root file system provided with the DIVELK (/home/dvdk/divelk/rfs/tisdk on the DVDK virtual machine) contains a pre-built version (4.8.0) of the QT libraries:
dvdk@dvdk-vm:~/divelk/rfs/tisdk/usr/lib$ ll libQ*
....
....
lrwxrwxrwx 1 root root       19 Dec 17  2012 libQtCoreE.so.4 -> libQtCoreE.so.4.8.0*
lrwxrwxrwx 1 root root       19 Dec 17  2012 libQtCoreE.so.4.8 -> libQtCoreE.so.4.8.0*
-rwxr-xr-x 1 root root  3233396 Dec 16  2012 libQtCoreE.so.4.8.0*
lrwxrwxrwx 1 root root       19 Dec 17  2012 libQtDBusE.so.4 -> libQtDBusE.so.4.8.0*
lrwxrwxrwx 1 root root       19 Dec 17  2012 libQtDBusE.so.4.8 -> libQtDBusE.so.4.8.0*
-rwxr-xr-x 1 root root   497236 Dec 16  2012 libQtDBusE.so.4.8.0*
lrwxrwxrwx 1 root root       26 Dec 17  2012 libQtDeclarativeE.so.4 -> libQtDeclarativeE.so.4.8.0*
lrwxrwxrwx 1 root root       26 Dec 17  2012 libQtDeclarativeE.so.4.8 -> libQtDeclarativeE.so.4.8.0*
-rwxr-xr-x 1 root root  3850720 Dec 16  2012 libQtDeclarativeE.so.4.8.0*
lrwxrwxrwx 1 root root       33 Dec 17  2012 libQtDesignerComponentsE.so.4 -> libQtDesignerComponentsE.so.4.8.0*
lrwxrwxrwx 1 root root       33 Dec 17  2012 libQtDesignerComponentsE.so.4.8 -> libQtDesignerComponentsE.so.4.8.0*
-rwxr-xr-x 1 root root  3012324 Dec 16  2012 libQtDesignerComponentsE.so.4.8.0*
lrwxrwxrwx 1 root root       23 Dec 17  2012 libQtDesignerE.so.4 -> libQtDesignerE.so.4.8.0*
lrwxrwxrwx 1 root root       23 Dec 17  2012 libQtDesignerE.so.4.8 -> libQtDesignerE.so.4.8.0*
-rwxr-xr-x 1 root root  5246140 Dec 16  2012 libQtDesignerE.so.4.8.0*
lrwxrwxrwx 1 root root       18 Dec 17  2012 libQtGuiE.so.4 -> libQtGuiE.so.4.8.0*
lrwxrwxrwx 1 root root       18 Dec 17  2012 libQtGuiE.so.4.8 -> libQtGuiE.so.4.8.0*
-rwxr-xr-x 1 root root  9852452 Dec 16  2012 libQtGuiE.so.4.8.0*
lrwxrwxrwx 1 root root       19 Dec 17  2012 libQtHelpE.so.4 -> libQtHelpE.so.4.8.0*
lrwxrwxrwx 1 root root       19 Dec 17  2012 libQtHelpE.so.4.8 -> libQtHelpE.so.4.8.0*
-rwxr-xr-x 1 root root   523292 Dec 16  2012 libQtHelpE.so.4.8.0*
...
...
...
dvdk@dvdk-vm:~/divelk/rfs/tisdk/usr/lib
The root file system also provides a lot of pre-built demos and examples (with the related source code and project files), contained in the following directories:
- /home/dvdk/divelk/rfs/tisdk/usr/bin/qtopia/demos
- /home/dvdk/divelk/rfs/tisdk/usr/bin/qtopia/examples
The Matrix-Gui application (http://processors.wiki.ti.com/index.php/Matrix_Users_Guide) that launched automatically after DIVELK startup is based on QT and can directly show some demos (simply touching the QT icon). Moreover, additional examples can be launched, for example the "calculator" QML demo:
# stop the Matrix Gui application, in case it is running
/etc/init.d/matrix-gui-2.0 stop
# enter the demo application directory
cd /usr/bin/qtopia/demos/declarative/calculator
# launch the application
./calculator -qws
Building a QT application[edit | edit source]
The following page describes how to build a simple application: http://processors.wiki.ti.com/index.php/Using_Qt_4.7#Creating_a_.22Hello_World.22_QtQuick_application
Opening/importing an example project from the DIVELK root file system[edit | edit source]
Qt Creator (http://qt-project.org/wiki/Category:Tools::QtCreator) can open/import the example projects provided with the DIVELK root file system. The developer can explore the project to read and analyse the source code and configuration file and learn how the Qt libraries work:

Resources[edit | edit source]
For additional information, please refer to the following pages:
- http://processors.wiki.ti.com/index.php/Category:Qt
- http://processors.wiki.ti.com/index.php/Qt_Tips
- http://processors.wiki.ti.com/index.php/Using_Qt_4.7
- http://processors.wiki.ti.com/index.php/Building_Qt
- http://qt-project.org/doc/
- http://qt-project.org/doc/qt-5/gettingstarted.html
- http://qt-project.org/doc/qt-5/qtexamplesandtutorials.html
- http://qt-project.org/doc/qtcreator-3.1/creator-qml-application.html
- http://qt-project.org/wiki/Category:HowTo
- https://www.youtube.com/watch?v=6KtOzh0StTc&list=PL2D1942A4688E9D63
- https://www.youtube.com/watch?v=1ILvH24PYHg