Difference between revisions of "How to update NELK"
DevWikiAdmin (talk | contribs) m (→Installation Steps) |
DevWikiAdmin (talk | contribs) m (→Installation Steps) |
||
| Line 17: | Line 17: | ||
# Start the DVDK virtual machine | # Start the DVDK virtual machine | ||
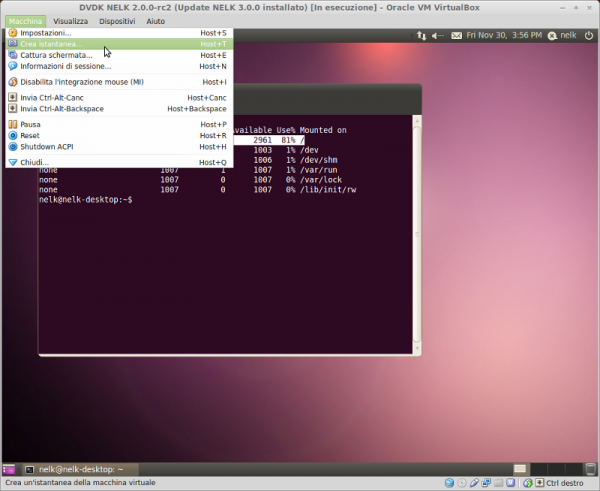
| − | # '''Take a snapshot of the current VM state'''. This creates a sort of "backup" | + | # '''Take a snapshot of the current VM state'''. This creates a sort of "backup" on your host machine that can be used to restore the previous installation. We '''recommend''' to take the snapshot because to do the update you need to remove the previous SDK (unless you have extended the disk space - see [[VirtualBox Extending Disk Size]])<br><br>[[File: Vm-take-snapshot.png|600px]]<br><br> |
# Fetch the nelk-x.y.x.tar.bz2 file. You several options, including the following: | # Fetch the nelk-x.y.x.tar.bz2 file. You several options, including the following: | ||
#* downloading it from inside the virtual machine (with a browser or file downloader); | #* downloading it from inside the virtual machine (with a browser or file downloader); | ||
Revision as of 15:24, 30 November 2012
| HOME | SOMs | SBCs | ToloMEO Embedded Assistant | ||
| Roadmap | IoT Services | ML/AI services | Embedded Design Services |
Info Box
|

Introduction[edit | edit source]
This page describes how to perform the NELK update procedure, starting from an existing DVDK installation and updating only the SDK (tools, sources and root file system) without creating a full new DVDK virtual machine.
 We assume that the DVDK provided with a previous kit version is already installed on the system |
Installation Steps[edit | edit source]
|
The update package consists in a compressed archive (nelk-x.y.x.tar.bz2). It can be downloaded from DAVE website or it can be found on the NELK distribution (SD card or USB pen drive) |
- Start the DVDK virtual machine
- Take a snapshot of the current VM state. This creates a sort of "backup" on your host machine that can be used to restore the previous installation. We recommend to take the snapshot because to do the update you need to remove the previous SDK (unless you have extended the disk space - see VirtualBox Extending Disk Size)
- Fetch the nelk-x.y.x.tar.bz2 file. You several options, including the following:
- downloading it from inside the virtual machine (with a browser or file downloader);
- sharing the file from a shared folder on the host machine using the "Shared Folder" feature (you need to have the Virtual Guest extension installed, see VirtualBox Shared folders);
- sharing the file from a shared folder on the local network (you need to have a working network configuration, see VirtualBox Network Configuration;
- Open a terminal emulator
- Enter the sdk directory:
cd /home/shared/devel/dave/naon-DAA/sw/linux/sdk - Remove the symbolic link to the root file system:
rm rfs/nelk - Check the available disk space:
df -m- if you have more than 3 GB available (check the
/dev/sda1line), you can proceed to the next step without removing the previous sdk version - if you have less than 3 GB available, you can follow the VirtualBox Extending Disk Size guide to free some space and continue the procedure to the next step; otherwise, you must remove the previous sdk directory:
rm -fr sdk-x.xx.xx.xx
- if you have more than 3 GB available (check the
- Un-compress the archive:
sudo tar xvjf <path-to-update-archive>nelk-x.y.z.tar.bz2. Include in the command the actual path to the nelk-x.y.x.tar.bz2 archive according on how you fetched it

The new components (sdk-x.xx.xx.xx directory, rfs/nelk-x.xx.xx.xx root file system and rfs/nelk symbolic link) will be installed into the /home/shared/devel/dave/naon-DAA/sw/linux/sdk directory.