Step by step guide to your first android app (DACU)
| HOME | SOMs | SBCs | ToloMEO Embedded Assistant | ||
| Roadmap | IoT Services | ML/AI services | Embedded Design Services |
Info Box
|
Contents
Introduction[edit | edit source]
This tutorial shows you how to develop your first Android application and run it on the DACU platform.
Boot the system[edit | edit source]
Let's assume the system is configured to boot loading the kernel and root file system from the internal flash.
Start the system as described in the Running Android in "normal mode" section.
 The default IP address is 192.168.0.122 |
Change the default ip address[edit | edit source]
If the default ip address is not suitable for your network configuration, you need to modify it. The first thing to do is to connect the null-modem serial cable to the J3 connector

and start your preferred terminal emulator, as described in the Running Android in "full control mode" section.
On the u-boot console, please enter the following command to check the default ip address:
=> print ipaddr
ipaddr=192.168.0.122
To change the ip address, please enter the following commands:
=> setenv ipaddr <enter-new-target-ip-address>
=> saveenv
Saving Environment to Flash...
Un-Protected 1 sectors
Un-Protected 1 sectors
Erasing Flash...
. done
Erased 1 sectors
Writing to Flash... done
Protected 1 sectors
Protected 1 sectors
=>
Once configured, you can start the system launching the following commmand:
=> boot
For further information, please refer to the U-Boot section.
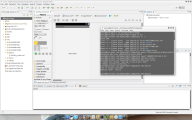
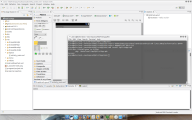
Check the Android Debug Bridge (ADB) and connect to the target[edit | edit source]
Start a connection through the Android Debug Bridge as described in the Running ADB section. Please note that setting the correct IP address on the target and is mandatory to make ADB work.
Develop your first application with Eclipse[edit | edit source]
Start working with Eclipse[edit | edit source]
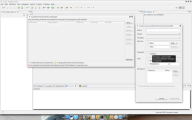
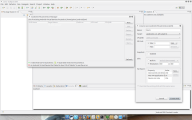
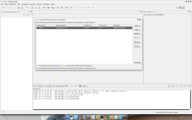
Launch the Eclipse IDE and start the AVD Manager to create a DACU emulator. To do that:
- click on "Window" on the top menù
- select "AVD Manager"
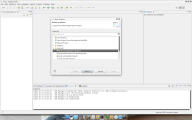
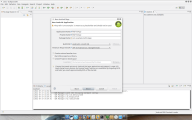
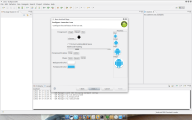
- on the "Android Virtual Device Manager" window, click on "New" and create a DACU emulator with the following settings:
- Name: DACU
- Target: Android 2.3.3 - API Level 10
- CPU/ABI: ARM (armeabi)
- SD Card: Size 4 GB
- Skin: Resolution, 800x480
- click on "Create AVD"
Please refer to the following pictures:
- Creation of a DACU virtual device


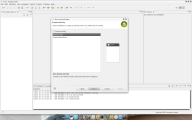
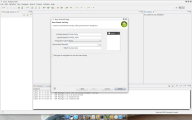
Create the application[edit | edit source]
Follow the instructions provided on the Creating an Android Project page to create a new project. The default project includes a simple application skeleton which runs a simple Activity which shows the "Hello Android" message. You can extend this application adding some other features. When you are comfortable, you can jump to the next step.
Please refer to the following pictures:
- Creation of the default application
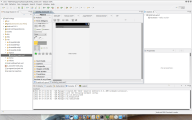


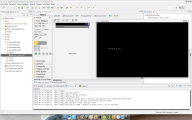
Launch the application on the emulator[edit | edit source]
To launch the application on the DACU emulator:
- click on "Run" on the top menù
- select "Run Configurations..."
- on the "Run Configurations" window, enter the project name and select the "do nothing" option
- click on "Run"
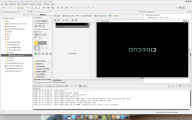
- after a while, the emulator will start and you'll see the Android lock screen
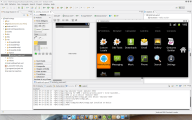
- drag the "lock" icon upwards to access the Android desktop
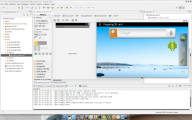
- on the right of the desktop there are three icons: click on the middle one (between the globe icon and the phone icon)
- click on the "MainActivity" icon: it will open the "Hello, world!" window.
Please refer to the following pictures:
- Running the application on the emulator
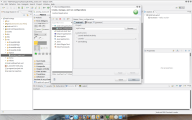


Deploy the application on the target[edit | edit source]
To install the application on the target, please follow these steps:
- close the running emulator
- check that ADB is running
- open a shell and move to the workspace directory containing the project files (example: /home/user/workspace/MyFirstApp)
- enter the bin sub-directory. If you list the content of this directory, you should see the application .apk file
- Using ADB, please lauch the following command:
adb install MyFirstApp.apk
Now you can access the device, go to the applications screen and touch the "MainActivity" icon to run the application.
Please refer to the following pictures and watch the Running "Hello, world!" app on DACU video:
- Deploying the application